

- Getting Started
- Time Tracking
- Monitoring & Productivity
- Desktop Timer Application
- Work Management
- Time Off & Scheduling
- Reports & Finance
- Administration & Settings
- Integrations
- FAQ
API Overview
Last updated
Introduction
Welcome to our API (Application Programming Interface) documentation — your comprehensive guide to integrating with our platform efficiently and securely. The API provides access to a broad range of data, empowering you to build, automate, and scale your applications with ease. Inside, you’ll find clear instructions, practical examples, and best practices to support you at every stage of your development journey.
Enabling API
API access needs two things:
- Your subscription plan must include the API. On a plan without it, the Access to Trackabi API permission in Settings > Roles is shown read-only and clicking it opens the subscription page. See Subscription & Billing.
- Your role must have the Access to Trackabi API permission. Open Settings > Roles, pick the role, and tick Access to Trackabi API in the Organization group of the Permissions tab.
Until both are in place, the API keys page shows No API keys found with the note API is not enabled for your user role, and Add new key is disabled. Ask an administrator to grant the permission — or check the plan — and reload the page.
If API access has been suspended for your company, the API keys page says so above the list. Your keys are kept, but every request made with them is refused until access is restored. Use Contact support on that notice to get in touch.
Data Available via API
The API allows users to access the same data they can view and edit in the system’s web interface, whether it’s in their personal area or the company section. What each user can see through the API depends on the permissions assigned to their role, which are set in the Roles settings.
For instance, if a user is a manager who has permission to view the full company timesheet and see other employees’ time entries, then that manager can retrieve the same data through the API using their API key. On the other hand, if the user is an employee who only has permission to see their own timesheet, the API will only provide access to their own data using their API key.
Generating API keys
A key belongs to your user in the company where you create it, and calls made with it see exactly what you can see.
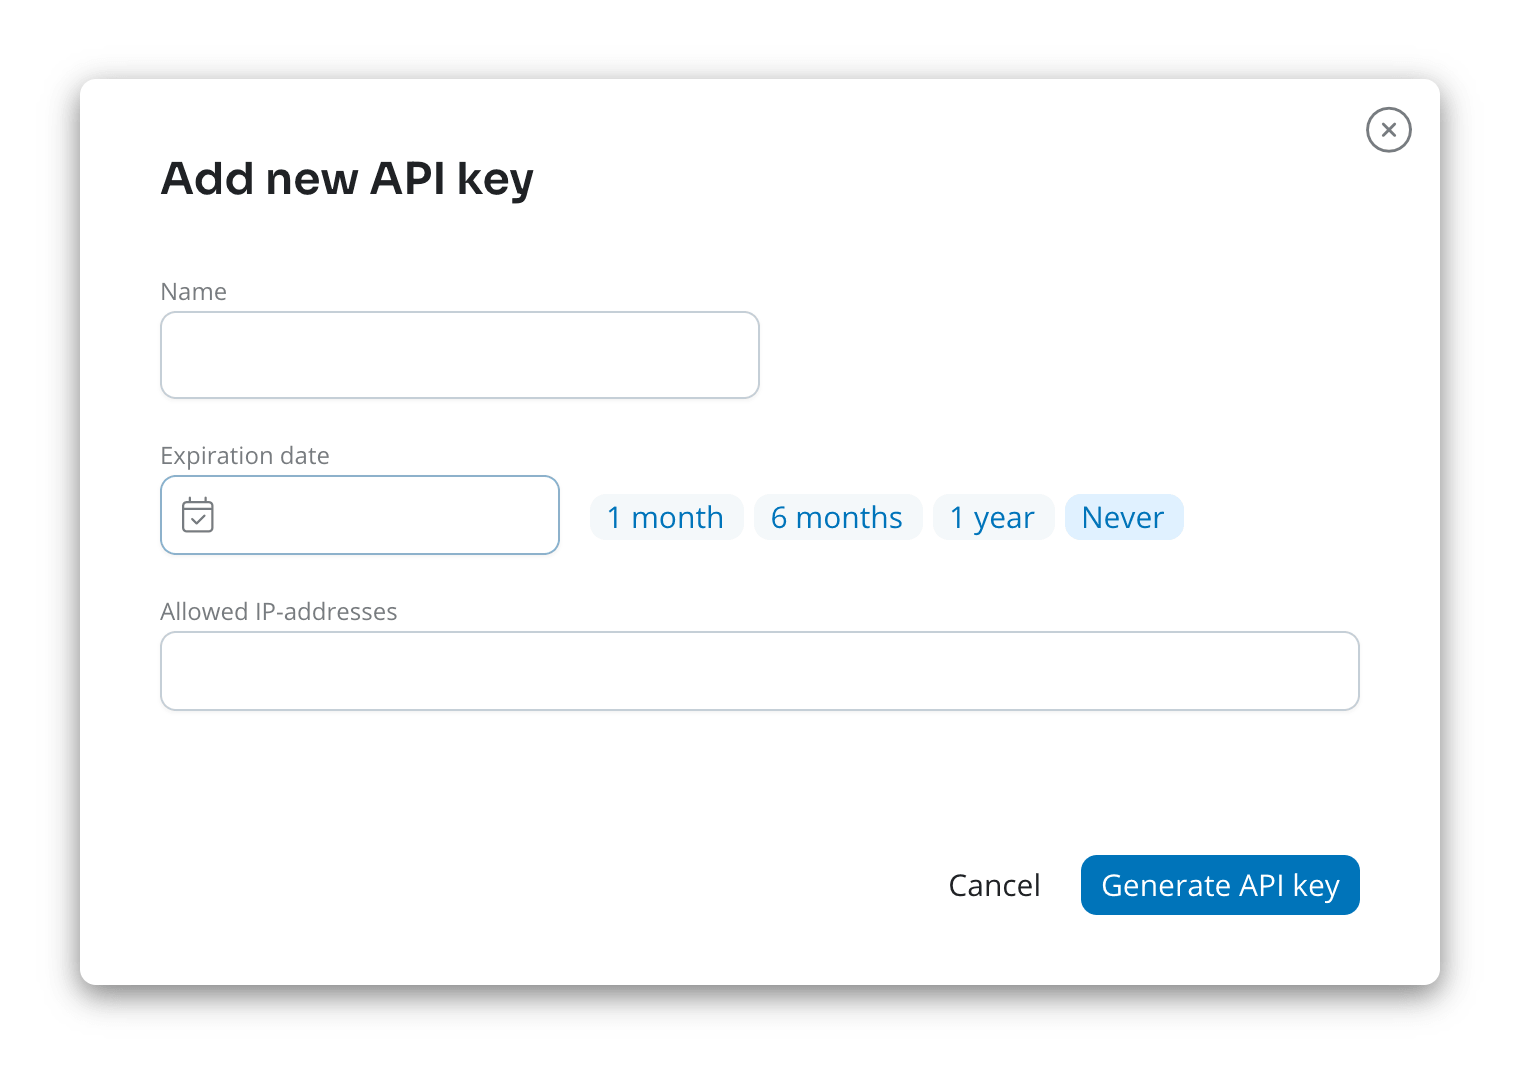
- Go to Personal > Settings > API keys and click Add new key.
- Give the key a Name (4–25 characters).
- Set an Expiration date, or use one of the presets — 1 month, 6 months, 1 year, or Never. The presets are offered only while creating; you can still pick any date later by editing the key.
- Under Allowed IP-addresses, add the addresses the key may be used from. IPv4 and IPv6 addresses and CIDR ranges such as
198.51.100.0/24are accepted. Leave the list empty to allow any address; a request from an address that is not listed is refused with Your IP address is not allowed for this API key. - Click Generate API key. The key is shown once, with a copy button — copy it now.
Once the dialog is closed the key cannot be displayed again: it is stored encrypted. If you lose it, delete the key and generate a new one.
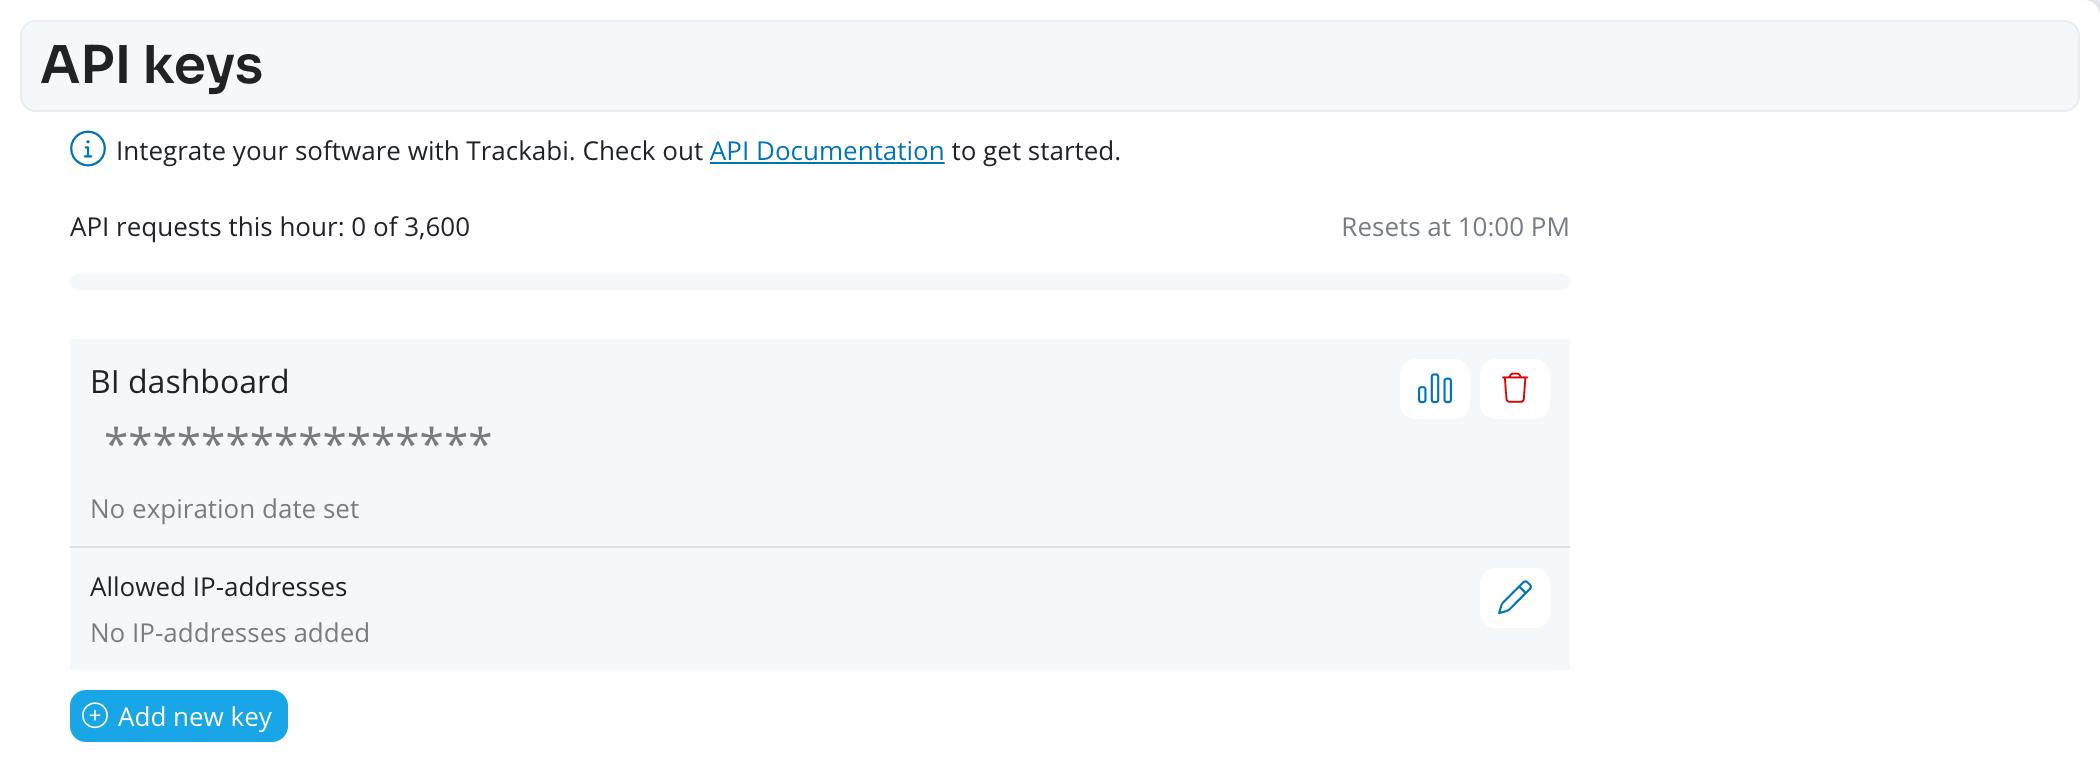
Each key in the list shows Expires on, Expired on, or No expiration date set, and its allowed addresses. An expired key stops authenticating until you edit it and set a later date. Edit API key changes the name, the expiration date, and the allowed addresses; it never reveals the key. The chart icon next to the delete button opens the key’s usage statistics (see Monitoring key usage below). You can keep as many keys as you need — one per integration is the usual pattern, so a single one can be deleted, or its traffic checked, without affecting the rest.
Request limits
Your subscription plan sets how many API requests you can make per hour. The API keys page shows your usage in a meter above the list — API requests this hour — with the time the count resets. The limit works like this:
- It is per user, not per key. All of your keys share one hourly allowance, so creating another key does not add requests.
- It follows the clock hour. The count resets at the start of every hour, not an hour after your first request.
- Every request counts, whatever its method, including requests that are then refused — for example from an address that is not allowed.
Once the limit is reached, the meter reads Limit reached — requests are refused until the next hour, and the API answers with status 429 and a Retry-After header giving the number of seconds to wait. While a limit applies, every response also carries X-RateLimit-Remaining, so an integration can slow down before it hits the limit.
Plans also cap how many records can be added through the API per day and per month; reading data is not capped this way. A request can carry at most 100 records. When a cap is reached, the API answers You've reached your daily limit for adding data via API (or monthly), and on a plan without write access, Your subscription plan does not allow adding records via the API.
Monitoring key usage
Click the chart icon on a key to see what has been done with it over the last 30 days: how many requests it made, which endpoints they went to, and which ones were refused. Use it to confirm an integration is running, to find out why it stopped, or to spot a key that is being used from somewhere it should not be.
The filter row at the top applies to both tabs. Pick a date and time range — the last two days are shown by default — and narrow the result by response (Successful (2xx), Refused or failed (4xx, 5xx), or a single status code) and by route.
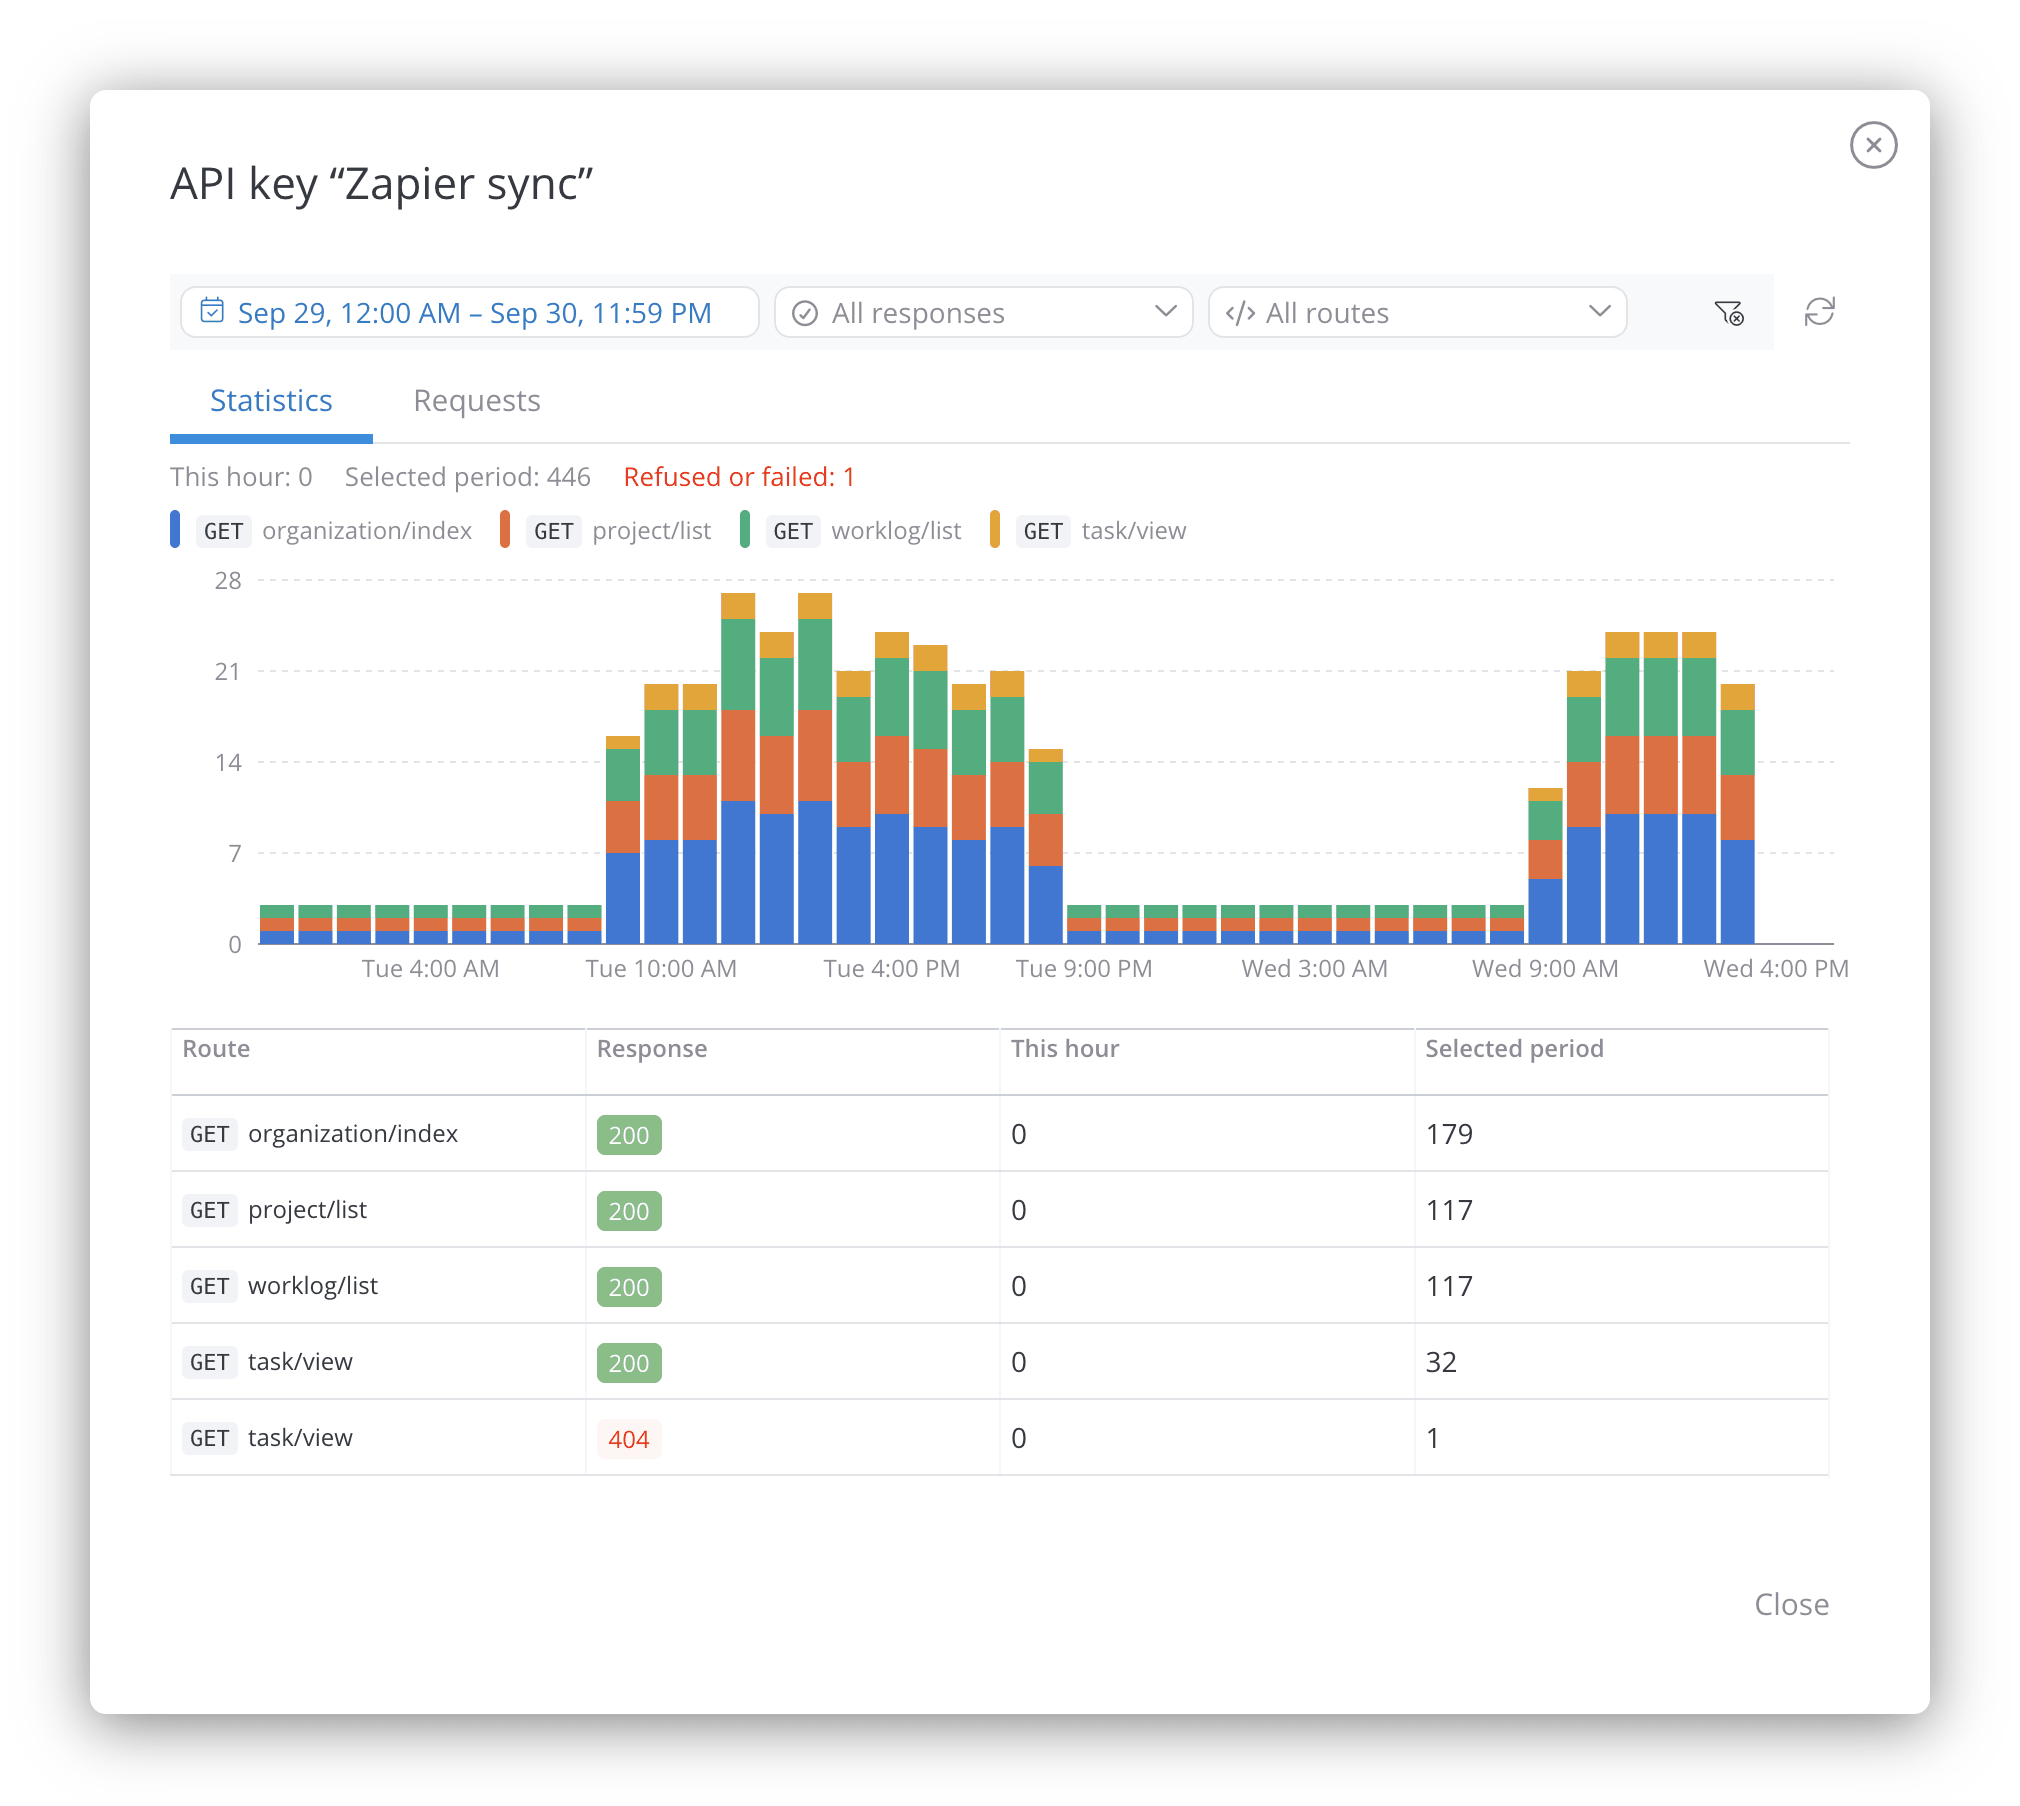
The Statistics tab shows totals for the current hour and the selected period, plus Refused or failed when any request did not succeed. The chart stacks requests by route, one bar per hour, or one bar per day when the range is longer than seven days. The table below it breaks the same requests down by route and response code.
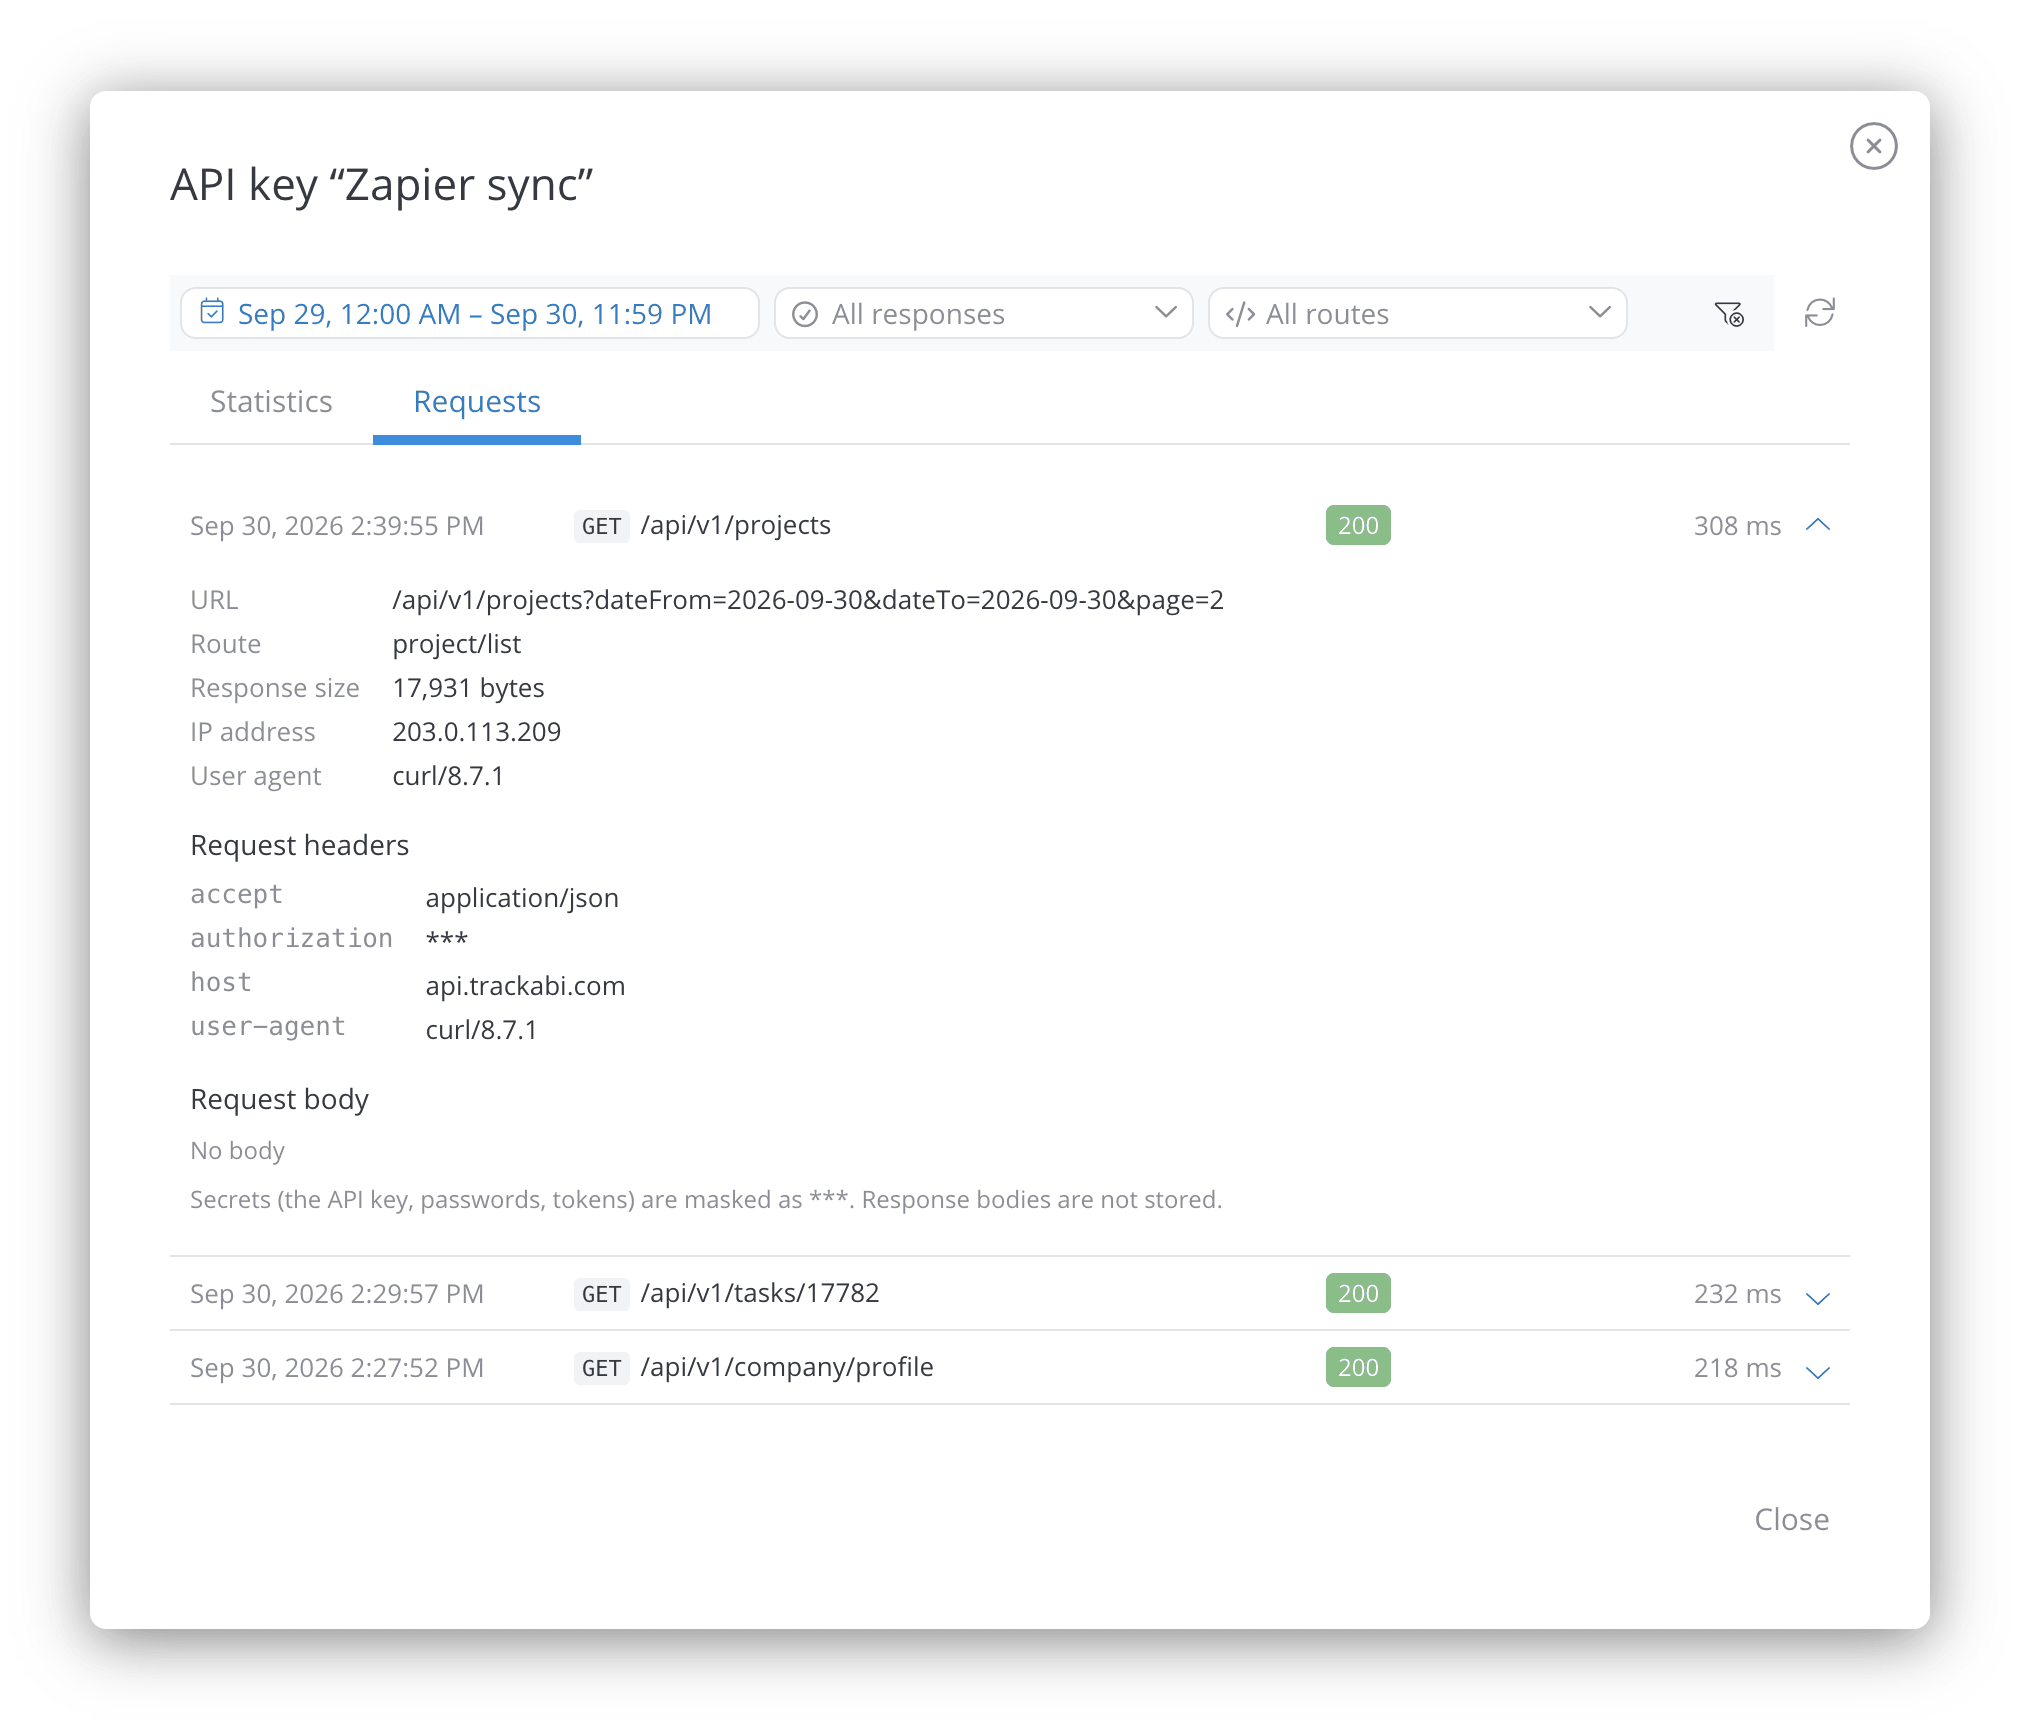
The Requests tab lists the individual requests, newest first, with their status and response time. Open one to see its full URL, the IP address and user agent it came from, its headers, and its body. This is where you find the exact reason a request was refused: the status code and error code match the error responses in the API Documentation.
The API key, passwords, and tokens are masked as *** in the log, and response bodies are not stored. Request bodies are kept up to the first 16 KB. Requests made with an unknown or mistyped key are not recorded, because they cannot be linked to any key.
Authentication
Our API uses token-based authentication. To authenticate your requests, include your API token in the Authorization header of each request using the following format:
Authorization: Bearer YOUR_API_KEY
API Endpoints
API basic URL: https://api.trackabi.com
API Routing Patterns:
- GET /api/v1/resources — Fetch a list of resources.
- POST /api/v1/resource — Create a new resource.
- DELETE /api/v1/resource/{id} — Delete a specific resource by ID.
List endpoints return a JSON array, one page at a time: pass page (from 1) and page_size (30 by default, at most 100). The response headers give X-Pagination-Total-Count, X-Pagination-Page-Count, X-Pagination-Current-Page and X-Pagination-Page-Size.
Computer activity recorded by the desktop app is available too:
- GET /api/v1/activity — Per member, for up to 31 days (
start_date,end_date, optionalmember_id): activity time, productive and unproductive time in seconds while a timer was running, the average activity score, and the top 5 apps. - GET /api/v1/activity/ranges — Per member, for up to 3 days: the productive and unproductive time ranges in the member's time zone.
min_gap(0–3600 seconds) joins ranges closer than that.
Every key sees its owner's own activity, and other members' only where the owner may view their desktop activity in the web app.
For complete endpoint details and request/response formats, please refer to our API Documentation. You can also test API requests directly within the documentation using the interactive forms.