

- Getting Started
- Time Tracking
- Monitoring & Productivity
- Work Management
- Time Off & Scheduling
- Reports & Finance
- Administration & Settings
- Integrations
- API
- FAQ
Logging Time in the Desktop App
Last updated
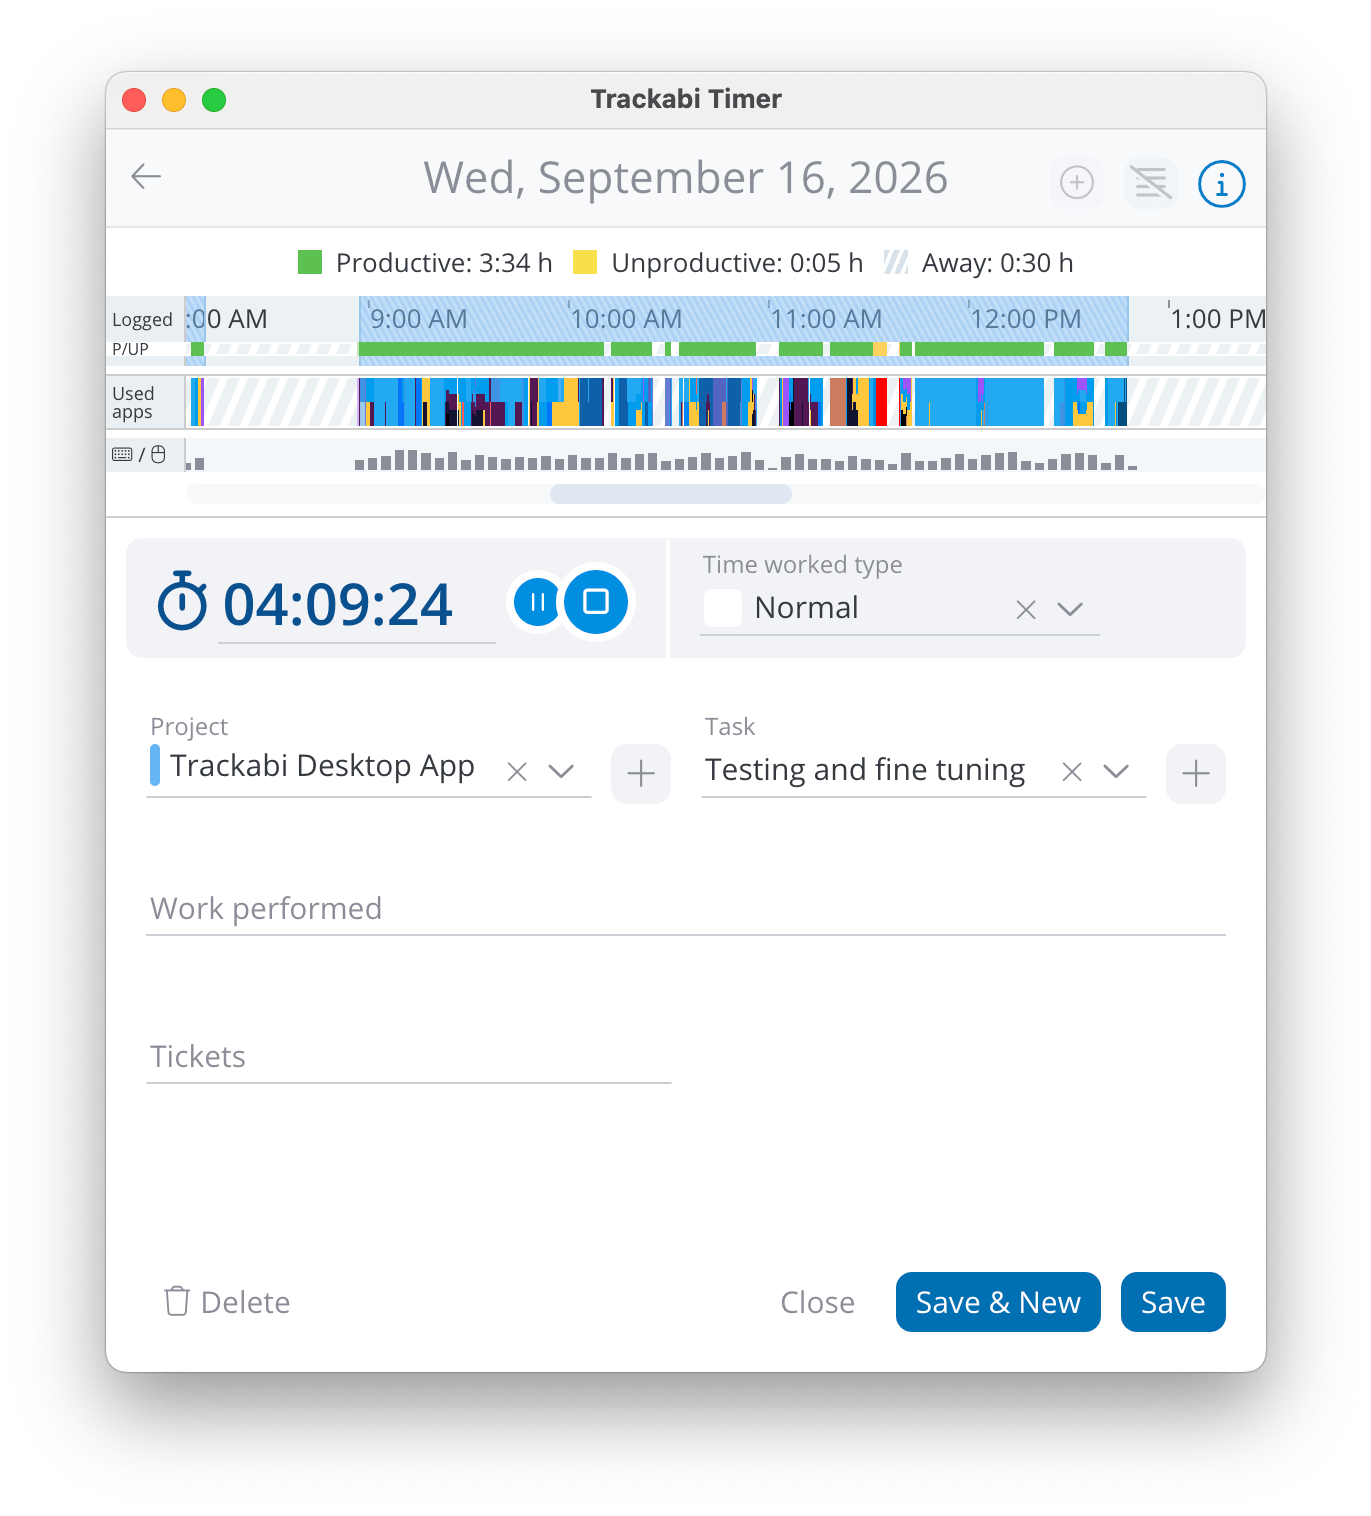
Clicking Add, or any entry on the Timesheet tab, opens the time entry editor. This is where the desktop application differs most from the web timer: the day's recorded activity sits directly above the form, so an entry can be built from what actually happened rather than from memory.
The activity timeline
The timeline runs across the top of the editor and spans the whole day. Above it, a legend gives the day's Productive, Unproductive, and Away totals. The timeline can be zoomed and scrolled, and it has one row per kind of record:
- Logged — the periods already in your timesheet, and the row the entry you are editing writes to. Hovering it shows the period, the device that recorded it, and the network address it was recorded from.
- P/UP — productive (green) against unproductive (yellow) activity, following the productivity rules that apply to you.
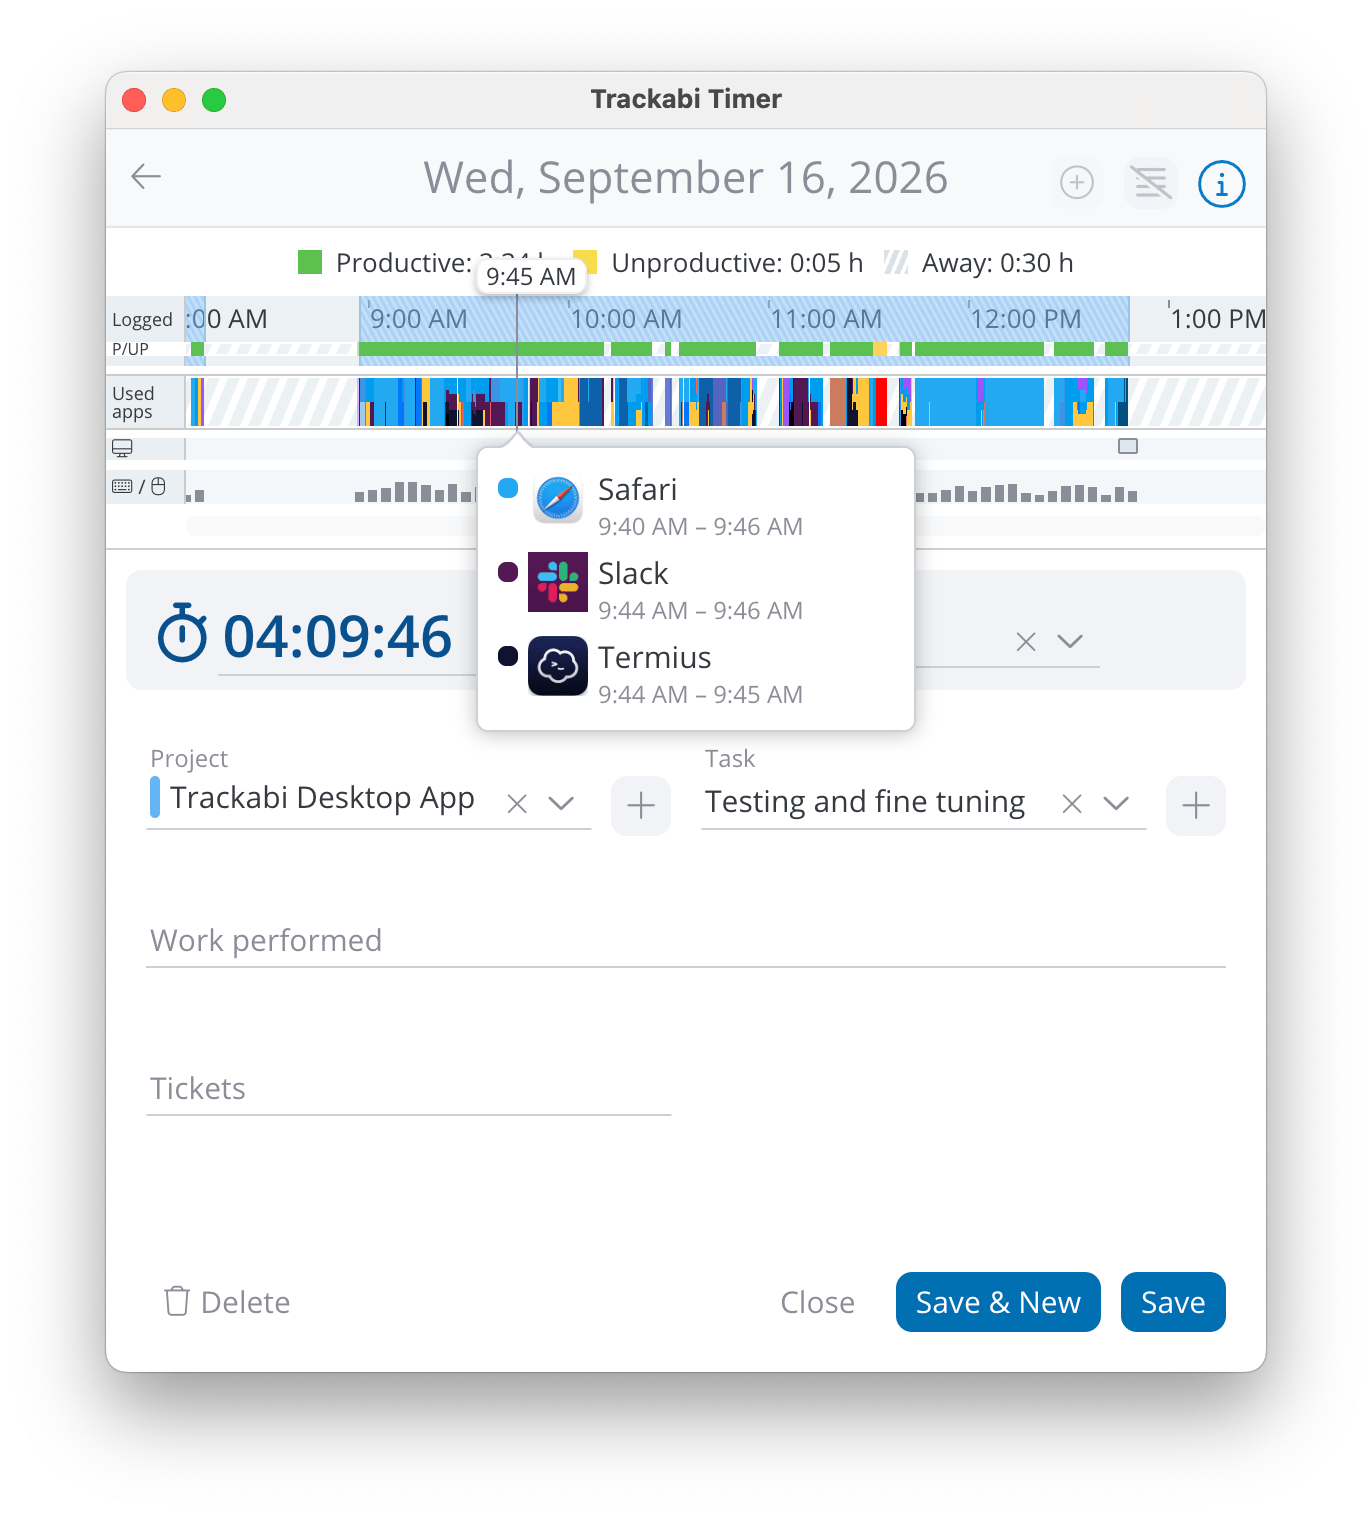
- Used apps — every application that held the foreground, each in its own colour. Hovering a point lists the applications active around it and the minutes each was in front.
- Screenshots — one marker per capture. Hovering previews the screenshot; clicking opens it full size.
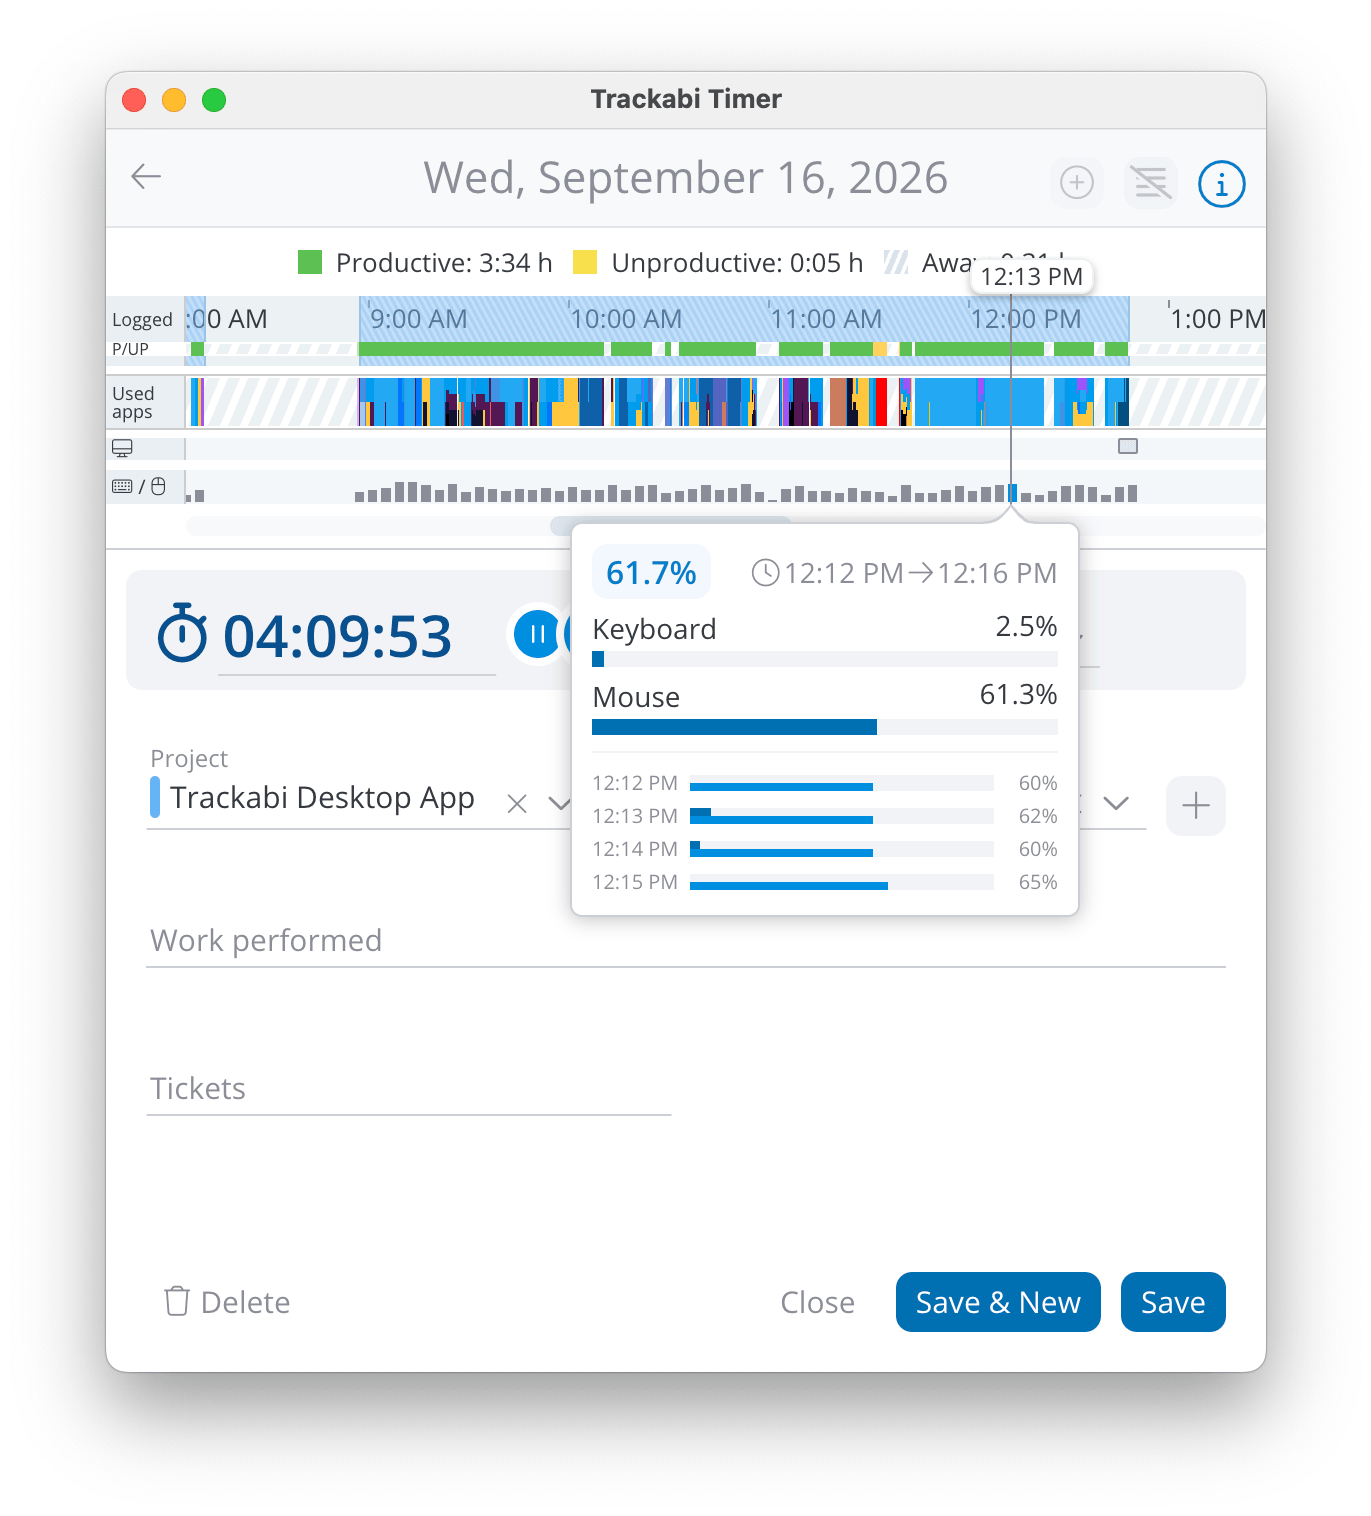
- Keyboard / mouse — per-minute bars. Hovering shows the activity score for that window, split into its keyboard and mouse shares, with a minute-by-minute breakdown.
Rows appear only where the data behind them is being recorded. With activity tracking off there is no P/UP, apps, or keyboard row; where screenshots are not enabled for you there is no screenshot row.
Turning recorded activity into a time entry
There are three ways, all of them on the timeline:
- Drag across a period on the timeline to log exactly that stretch of the day.
- Add all work activity times — the + button above the timeline logs every period of automatically recorded productive activity for the day in one action.
- Clear all added time — the button beside it drops the entry's selection so you can start again.
The ⓘ button next to them opens a guided overlay that labels the timeline rows and these buttons in place. It is highlighted the first time you open the editor.
The entry form
Below the timeline sits the timer with its own editable total, then Time worked type — Normal, Overtime, Vacation, and any other type your company defines — followed by Project, Task, Work performed, and Tickets. The + beside Project, Task, and Client creates a new one without leaving the application.
Which fields appear, what they are called, and which of them are required all come from your company's timesheet field settings, so this form matches the one on the web timesheet. See Timesheet Settings and Time Types.
Save closes the editor. Save & New saves and immediately opens an empty entry for the same day, which is the quicker path when writing up a day in one sitting. Delete removes the entry, and is hidden where your role may not delete its own entries.
When the editor will not let you type a time
Three restrictions come from the web interface rather than from the application:
- Where your role may not log time manually, the total cannot be typed. It has to come from the timer or from the timeline.
- A day inside your company's lock period cannot be edited at all, and the app explains why when you hover the entry. See Timesheet Locking.
- A running timer's total cannot be edited while it is running. Pause or stop it first.
Using the timer on more than one computer
The timer belongs to your account rather than to a machine, so signing in on a second computer shows the same running timer. Only one machine records at a time: the app asks “Would you like to switch tracking time to this computer?” on the machine that does not currently own the timer, and activity and screenshots are recorded only by the machine that does.
Working offline
The timer keeps running with no connection. Entries made offline are queued, and screenshots are written to disk before any upload is attempted, so nothing is lost to a crash, a quit, or a power cut. Everything is sent once the connection returns.
The app distinguishes the two cases: “You are offline…” when the computer has no network at all, and “Can't reach the server” when the network is up but Trackabi is temporarily unreachable.